My daughter is starting gr 4 tomorrow and she is nine years old. She has been slowly moving out of the "pink and pretty" type of decor for a little while now, but is still very much a young nine. I had hoped to fend off her requests for a room makeover, but I had worked on her brother's room last winter and she was anxious to have a fresh start in her room as well.
I couldn't really blame her. We had taken possession of this house and moved in all in around 2 weeks which left very little time for decorating. It wasn't a bedroom which echoed her personality and as she and her friends hang out there more, I wanted it to feel like a fun spot.
I did not want this to cost very much as I have a feeling that her tastes may change as she gets older, but I think that there is a lot in this room that will be able to change with her. I started to keep my eye out for things on my treasure hunts.... I knew she needed bookshelf space. I knew she needed more drawer space. I knew she needed a new bed frame. Aside from these things, I really didn't have a vision..... Then, along came Pinterest. S I G H.
I was SOOOOO inspired by this room. If you are on Pinterest at all, you have probably seen it somewhere as it is a pretty popular pin. Take a look ~ it is so pretty and really spoke to my girl's personality as well. She was adamant about wanting to stay away from pink, but she thought she would be okay with coral (YAY!). I wanted to use bright and energetic colours and chose to paint the walls a bright turquoise.
I also wanted to paint the closet wall with chalkboard paint so that she and her friends would have a place to doodle and have some fun. It would also be sort of a unique feature. To bring the black into the room, I thought it would be nice to have a black and white wallpaper along the long wall. I did a brave thing here ~ I took her with me to Lowe's. They have a really awesome wallpaper aisle and they have a great selection of black and white papers in stock for under $40 a roll. I told her she could choose from any of the black and white they had. I really tried to let this be her choice ~ the one she settled on would not have been my choice, but she loved it and I do love the way it turned out!
I had found the 2 little matching dressers at a thrift store in spring. I had to buy them because it is hard to find 2 matching dressers that size! Initially I was planning to use them in the master bedroom makeover I am planning, but as I thought it over, they seemed like a great fit for this project! They would give her lots of storage space, but would not overwhelm the room. She is still sort of small, so she can easily reach all of the drawers and they are shallow so they can be kept reasonable neat. (Fingers crossed on this one!).
The bed is a Hemnes model from Ikea. I found it on Kijiji without any of the hardware needed to reassemble it. I decided to paint it black and distress it a little to add the needed character. I went to Ikea (ON THE SATURDAY OF A LONG WEEKEND!) and waited in line at customer service to see if they could find the correct hardware. The models can change from year to year slightly and this exact design (brown stain with round spindles) has been discontinued. They were very helpful and since I only needed about 8 pieces, they did not charge me at all.
The bookcase is another thriftstore find. I thought it was great to have the closed lower storage and lots of room for books and her endless odds and ends. I loved the yellow in the inspiration room, so I decided to take the plunge with more colour. I really love the way it turned out! I added some black and white wallpaper along the back (it is not the same print as the paper on the wall ~ just extra I had left over from other projects). As you can see in the above picture, this wall across from the bed is a bit tough. That door goes to the Jack and Jill bathroom that the kids share. It is a great feature, but the drawback is that it adds another door to each bedroom, reducing furniture arrangement options. I still need to find some art or a mirror to add to this space....
I added the wire frame in yellow on the opposite side of the window from the bookcase to just add a little more yellow to balance that wall out a bit. I am still on the lookout for some pretty curtains to hang (that is why the frame is slightly off-centre). The bedding is from HomeSense and made by Cynthia Rowley. I love it SOOOO much. It is perfect in there!
This room is not finished yet, but the spirit of it is. I want to find some art and fill in a few spaces and have some fun with the details. I just wanted to share some of the projects I have been working of for my home too!
I had a decorative dress form that I added and she went crazy! If I had known how much she would love it in her room, I would have given it to her earlier. As you can see, she has it dressed in her outfit she chose for her first day of gr 4. So cute!
I tried to add up the total cost of the room makeover including paint and wallpaper and it came in under $300! This was pretty dramatic and just took a little extra time and patience (and work!), but I think it was worth it. She loves her new space and I do too!
I apologize for the darkness in the pictures. I tried with the blind open and with it shut and this seemed to look better, but it is tricky to get the lighting right in this small room!
Now I just need to get inspired for my own room!
Showing posts with label Projects. Show all posts
Monday, 3 September 2012
Wednesday, 25 January 2012
{Updating My Boy's Room}
My oldest child is an 11 and a half year old boy. His name is Alistair and he is very particular (classic first-born).... For many years, he would not even consider letting me change the paint colour in his room. He likes what he likes and it takes a lot to change his mind. When we moved just over 2 years ago, we took possession of this house very quickly and painted his room a very non-offensive blue and he was okay with that until recently.
He loves to collect old bottles ~ mostly pop like Coke and 7-Up. He has other vintage-y types of things and some little cars and boxes as well. It had become a challenge for him to organize all of these treasures in a way that looked good so I started on a hunt for a display cabinet of sorts. We had inherited double bedroom set that was in perfect condition. It is from the 50s/60s with a great mid-century feel. I wanted whatever piece that I found to have that feeling as well. The bed frame is walnut and as I said, in near perfect condition so I did not want to paint it. After a few weeks of searching, I found this!
It was of a similar vintage and offered a perfect setting for his little collectables. Although it looks good in the photo, it was in need of refinishing ~ especially along the sides. Something had been spilled and a repair was made, but it did not look good. I would have had a hard time painting this if it was in good condition!
Alistair has always LOVED orange. I did talk him out of painting his room orange, but agreed to paint this cabinet a version of his favourite colour. He made me promise NOT to distress it as he finds that idea horrifying.
This is what I did for him.
I left the legs original, but painted the main part of the hutch Harvest Moon by Benjamin Moore with the new Advance paint. This is a lovely paint to replace the classic oil-based melamine paint. It is available in any colour and dries really smooth and hard. I wanted the inside to be a contrast to the orange so I painted it Balboa Mist (a creamy pale grey) in the same type of paint. I used the same hardware and sprayed them a nice bright red.
I made a template from some stick-on vinyl and used a spray-on glass froster for his initials on the glass sliders. Very subtle, but he likes that they are there...
The pictures look a little dark as his room does not have good natural light, but overall, I think it turned out pretty well.
I repainted his walls a darker blue and decided to add a few stripes.
My initial plan was to go all the way down the wall around the closet, but he loved it at this point and asked me to stop. He is fairly conservative and I think this was a bit of a stretch already for him. I used FrogTape to paint the stripes and I will never use anything else to block off paint again. It is easy-peasy lemon squeezy and it the lines are SHARP! No touch ups required!
I have yet to find bedding that I like and I have a little bookshelf to paint so I won't show the rest of the room yet. Today I picked up some shelves at Ikea to give him a spot for his books and other things as well.
I love that I can do something unique for my kid that makes him happy.
Thursday, 8 December 2011
All the Extra Stuff
I have been getting my house decked out for Christmas and getting a few projects finished up for the season.
I love seeing the house all cozy and Christmasy, but it can be a lot of work! My kids love to help, which seems nice, but lets face it, it can easier to just do it yourself!
Remember these old stumps?
They have finally dried out and I have done something with one....
I was inspired last year by this post from Karen at The Art of Doing Stuff. I roughly followed her guidelines and now I have my very own tree stump in the house. In this part of Alberta, tree stumps of this size are not easy to come by! I had to source mine from north of Edmonton...
It is peeled and sanded and has several coats of poly on it too. I am thinking about adding some legs ~ a friend suggested some castors and I think I like that idea even better! In the meantime....
My standard puppy picture! Isn't she cute!
I wish I could remember where I saw the idea for my next home project... I read a version of it somewhere!
As I often visit thrift stores, old wood bowls and candle holders and things like that are a fairly common find. How to repurpose them?
I used GOOP and glued the candle holders to the bowls.
After letting it set and dry, I spray primed the whole unit. I then sprayed each piece with a glossy grey that I had on hand and *voila*, a pedestal bowl!
I don't think this is food safe, but it so nice for adding height and interest to a mantle or table.
Each little pedestal was only a few dollars and looks unique.
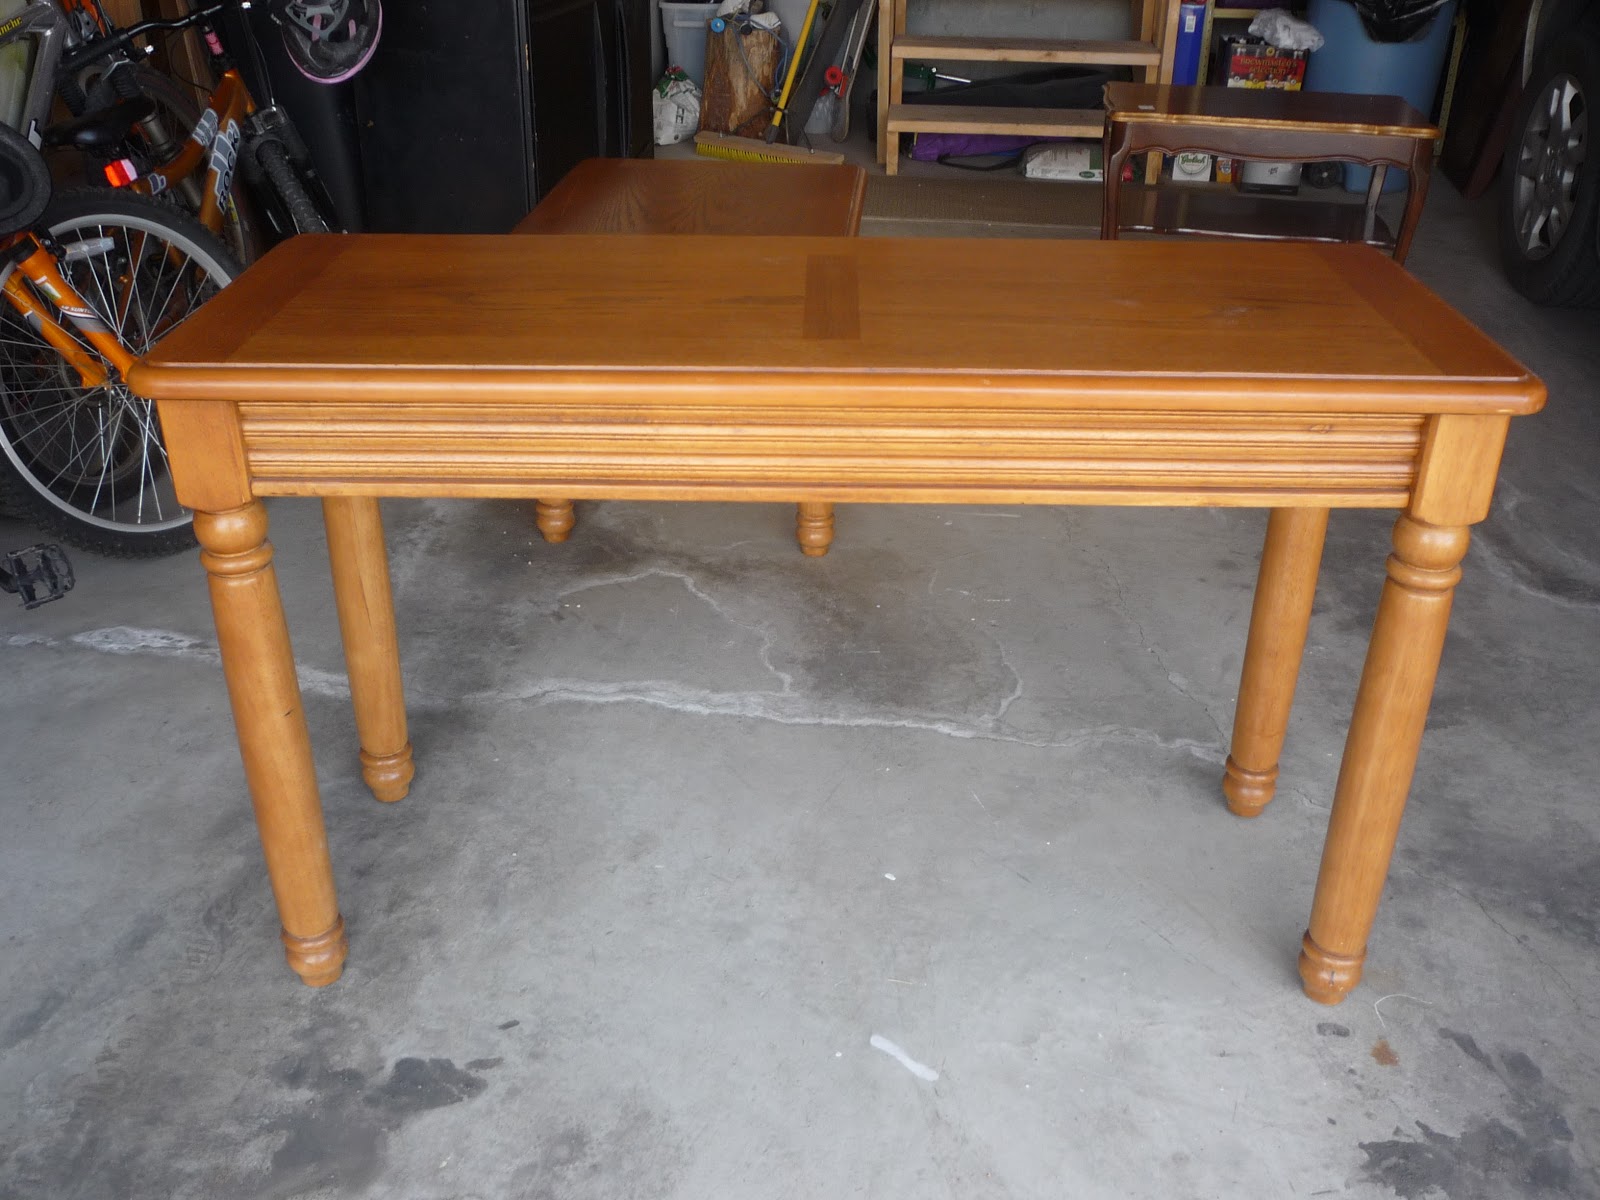
I found a sofa table a few weeks ago on kijiji and I could not pass it up.
Typically honey coloured and dated, but so solid and with lovely lines. I brought it home and it fit so perfectly against a wall by my couch that I decided to keep it for now. I painted it a dark taupey grey and fell even more in love with it. I had visions of doing a beautiful seasonal display on it... This vision was dashed by the arrival of not one, but TWO Lego advent calendar for my kids. My husband thoughtfully bought them each one (Star Wars and City ~ complete with poor Yoda in a Santa suit no less). These suckers take up a LOT of room, so now we have a lovely spot to very prominently display them.
Sigh.
I will try again at Easter.
In other news, I am very excited about the arrival of my stamp with my new logo on it. I have been stamping everything in sight!
I have a few commissioned pieces to finish up before Christmas. I have promised my family to take some time "off" with them so I will be back to more regular posts and sale items in January.
Wednesday, 9 November 2011
Fully Installed!
Yesterday I drove east for about an hour out to the little town of Rosebud, Alberta. It is a very special place in southern Alberta as it is home to a very popular theatre company and people come from all over the world to attend the dinner theatre and browse the galleries and little shop there. I am beyond thrilled to have the opportunity to put a selection of my pieces in the Mercantile area of the theatre. These will be available for purchase to the public during the Christmas season. I chose to put a few things in that I normally don't sell online as they are small things that I like to try out for my home or as gifts for friends. If you like any of it, let me know and I will do my best to create something similar for you.
Here is a shot of some of the goods as they were installed yesterday. I had a lot of help and support from the incredibly talented Valerie Speer ~ she works in Rosebud and is an amazing artist. Check out her stuff ~ you will love it!
| Midcentury bookcase |
| Child's table with chairs and chalkboard |
![]() |
| Book Page Wreath |
| Shabby Architectural Interest Piece |
![]() |
| Shabby Ladder |
| BEFORE |
| AFTER ~ Distressed Telephone Bench |
| Old Window Frame with Netting and Knobs *great for jewelry or photos* |
| Large Shabby Leaner Mirror |
![]() |
| Small Frame with Wire |
| Distressed groupings of Frames |
This has definitely been a new experience for me. I usually do one piece at a time so to see all of it together is very exciting.
I am working on a few new things this week that I think will be great! I love to hear from readers and friends about what they see that inspires them.... Enjoy your day!
Wednesday, 19 October 2011
Refreshing...
It's not just for Furniture.
As I write this, my suitcase sits, unpacked in my closet. I am leaving on a plane tomorrow morning to a nice, sunny and warm place with no children or meetings or lists to write. My husband is holding down the rodeo here with the kids, his job, soccer, track, volleyball, birthday parties, spelling tests and piano lessons. There are probably a few more things that I forgot. Anyway, I am off for a few days of refuelling so I won't be listing anything until the end of next week.
I thought I would leave a sneak-peak of what I have in the works right now.
This desk/chair combo is a commission for a good friend of mine. It is pretty much complete and I am anxious to share it. I had some fun with the chair and I think it paid off!
This was a thrift store find from Edmonton.
This amazing cabinet was a score from Kijiji and it was purchased with my son's bedroom in mind. It just needs some final touches and will then be ready for installation. His room is going through a makeover right now and I hope it comes together well enough to share here.
A local thrift store treasure ~ I may have a home for this so I am not sure that I will be able to give it up....
This is an incredible vanity table with LOADS of jewelry storage. It is a commission piece and I am excited to get working on it.
And ~ a moose antler! Decorating with antlers is fun!
So thanks for your patience for the next week or so. If you have a project you would like to discuss, please shoot me an email and we can make a plan! I hope to be back with lots of energy....
Sunday, 16 October 2011
Taking Some Risks
I have been really trying to get our bedroom looking a little more sophisticated and a little less "college-y". Our kids are now closer to college than we are.
Last year I found a duvet cover that really inspired me. I can't tell you why, but I really fell in love with it. It just connected on a level that only a duvet cover can. If this has happened to you, you will know what I mean. It took a lot of work and a cross border trip to Montana to actually secure this linen, so I am very motivated to make it work for the long-term.
I have been working to incorporate a bench at the end of the bed. I am on a budget so I wanted to do it on the cheap. I found this bench on Kijiji and thought it would work after a little overhaul:
I sanded and sanded this baby and then sprayed it a green to match my beloved duvet. I went to re-upholster the top and as I took off the old fabric, I realized that the whole interior was soaking wet and covered in MOULD! Out to the trash (while holding my breath!). It did seem dry to the touch, but it was really bad on the inside. This is a hazard of the second hand purchase. Anyway, I took a quick trip to Home Depot and they were more than happy to cut a piece of MDF to size for me. This was only another $8 or so. Good to breath non-mouldy air. I finished it with a less "cushy" layer of foam and I am really loving the way it turned out:
So the next thing was the night stands. I had been using Ikea tables. There was nothing really wrong with them. but I wanted to add a little more fun. I am not really a fan of the whole matchy-matchy bedroom set so I was happy to find this set of end tables and a coffee table:
Straight out of the 80s!
Did you know that if you use this
you can spray paint glass? This blew my mind a little bit so I was more than eager to give it a try.
I laid out the glass. I decided I wanted it to look a little bit fun so I picked up some vinyl decals at Dollarama.
I created a design on the glass and covered them with the frosted glass spray.
I covered that with the same green that I painted the bench with.
I then removed the decals. For the sharpest contrast, do this while the paint is still wet.
In the meantime I had painted the side tables a pale grey. I put it all together and was very pleased with myself!
There are TWO!
It is so great when things work out the way that you hope they will.
Anyway, I put it all together and I am very happy with the way it is coming together.
That is a coffee station in the corner. Early morning java is very important to me.... I think I will be moving that now as the tables take up a little more room.
The point is that sometime taking some risks can turn out alright and then your style can really shine through.
Subscribe to:
Posts (Atom)