Pinterest

Follow Me on Pinterest
Showing posts with label DIY. Show all posts

Thursday, 8 December 2011

All the Extra Stuff

I have been getting my house decked out for Christmas and getting a few projects finished up for the season.


I love seeing the house all cozy and Christmasy, but it can be a lot of work! My kids love to help, which seems nice, but lets face it, it can easier to just do it yourself!


Remember these old stumps?


They have finally dried out and I have done something with one....


I was inspired last year by this post from Karen at The Art of Doing Stuff. I roughly followed her guidelines and now I have my very own tree stump in the house. In this part of Alberta, tree stumps of this size are not easy to come by! I had to source mine from north of Edmonton...


It is peeled and sanded and has several coats of poly on it too. I am thinking about adding some legs ~ a friend suggested some castors and I think I like that idea even better! In the meantime....


My standard puppy picture! Isn't she cute!


I wish I could remember where I saw the idea for my next home project... I read a version of it somewhere! 


As I often visit thrift stores, old wood bowls and candle holders and things like that are a fairly common find. How to repurpose them?


I used GOOP and glued the candle holders to the bowls.


After letting it set and dry, I spray primed the whole unit. I then sprayed each piece with a glossy grey that I had on hand and *voila*, a pedestal bowl!


I don't think this is food safe, but it so nice for adding height and interest to a mantle or table.


Each little pedestal was only a few dollars and looks unique.


I found a sofa table a few weeks ago on kijiji and I could not pass it up.


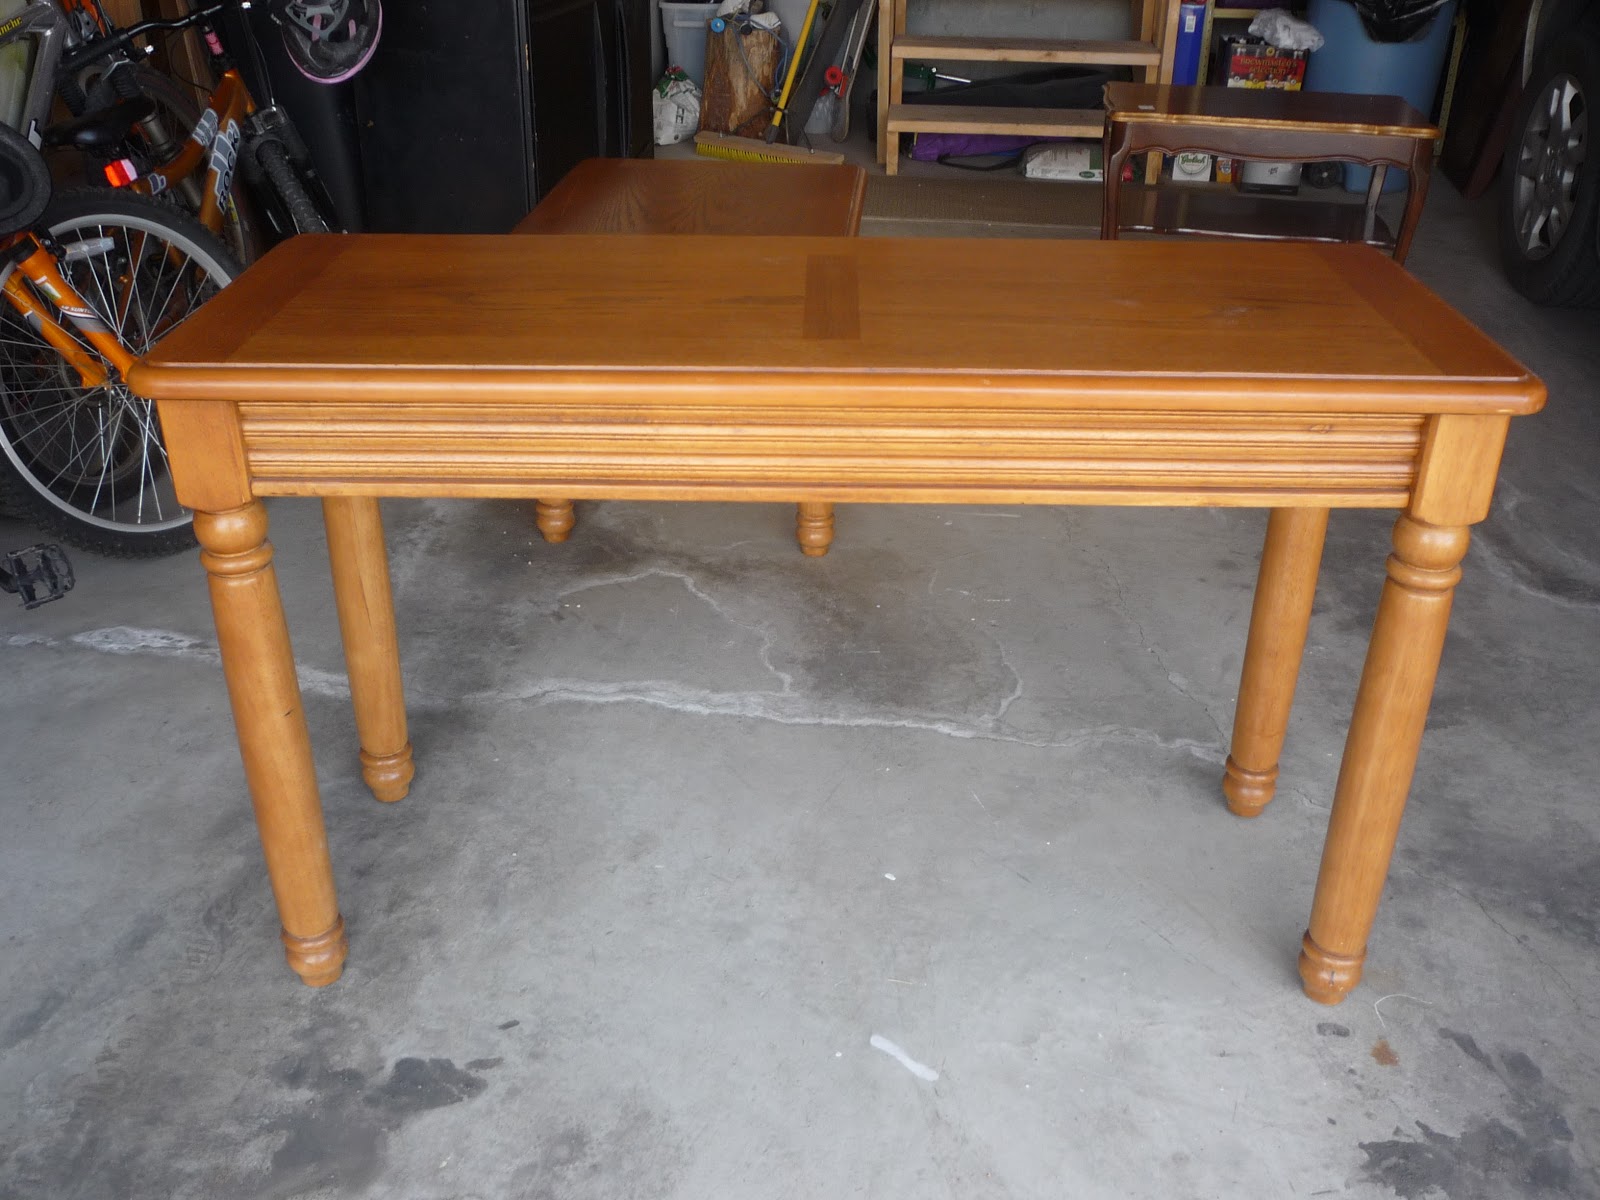
Typically honey coloured and dated, but so solid and with lovely lines. I brought it home and it fit so perfectly against a wall by my couch that I decided to keep it for now. I painted it a dark taupey grey and fell even more in love with it. I had visions of doing a beautiful seasonal display on it... This vision was dashed by the arrival of not one, but TWO Lego advent calendar for my kids. My husband thoughtfully bought them each one (Star Wars and City ~ complete with poor Yoda in a Santa suit no less). These suckers take up a LOT of room, so now we have a lovely spot to very prominently display them.


Sigh. 


I will try again at Easter.


In other news, I am very excited about the arrival of my stamp with my new logo on it. I have been stamping everything in sight!


I have a few commissioned pieces to finish up before Christmas. I have promised my family to take some time "off" with them so I will be back to more regular posts and sale items in January.

Sunday, 16 October 2011

Taking Some Risks

I have been really trying to get our bedroom looking a little more sophisticated and a little less "college-y". Our kids are now closer to college than we are.

Last year I found a duvet cover that really inspired me. I can't tell you why, but I really fell in love with it. It just connected on a level that only a duvet cover can. If this has happened to you, you will know what I mean. It took a lot of work and a cross border trip to Montana to actually secure this linen, so I am very motivated to make it work for the long-term.

I have been working to incorporate a bench at the end of the bed. I am on a budget so I wanted to do it on the cheap. I found this bench on Kijiji and thought it would work after a little overhaul:


I sanded and sanded this baby and then sprayed it a green to match my beloved duvet. I went to re-upholster the top and as I took off the old fabric, I realized that the whole interior was soaking wet and covered in MOULD! Out to the trash (while holding my breath!). It did seem dry to the touch, but it was really bad on the inside. This is a hazard of the second hand purchase. Anyway, I took a quick trip to Home Depot and they were more than happy to cut a piece of MDF to size for me. This was only another $8 or so. Good to breath non-mouldy air. I finished it with a less "cushy" layer of foam and I am really loving the way it turned out:


So the next thing was the night stands. I had been using Ikea tables. There was nothing really wrong with them. but I wanted to add a little more fun. I am not really a fan of the whole matchy-matchy bedroom set so I was happy to find this set of end tables and a coffee table:


Straight out of the 80s!

Did you know that if you use this


you can spray paint glass? This blew my mind a little bit so I was more than eager to give it a try.


I laid out the glass. I decided I wanted it to look a little bit fun so I picked up some vinyl decals at Dollarama.


I created a design on the glass and covered them with the frosted glass spray.


I covered that with the same green that I painted the bench with.


I then removed the decals. For the sharpest contrast, do this while the paint is still wet.

In the meantime I had painted the side tables a pale grey. I put it all together and was very pleased with myself!


There are TWO!


It is so great when things work out the way that you hope they will.

Anyway, I put it all together and I am very happy with the way it is coming together.


That is a coffee station in the corner. Early morning java is very important to me.... I think I will be moving that now as the tables take up a little more room.

The point is that sometime taking some risks can turn out alright and then your style can really shine through.

Friday, 7 October 2011

Super Fast Portrait Silhouettes

This is a super fast and trendy little project that is perfect if you happen to be hosting a crowd this weekend and need a little something special to fill in a neglected corner somewhere. I am sure there are lots of places on-line that will show you a beautiful way to accomplish this, but I like how quick and dirty this is.


What you need:

digital camera
basic photo editing software
heavy duty glue (I like GOOP)
picture hangers
roll of vinyl chalkboard (I found this at Dollarama for $1)
some sort of surface to hang put it on (plate, mirror, picture frame)

I took pictures of my kids in profile standing in front of a sunny window.


I just used the iPhoto editing tools included on my Mac and increased the contrast as much as I could and chose to convert it to black and white.


I printed these and cut them out (just choose an appropriate size for your project).

You can choose which was you would like them to face ~ just trace them onto the back of the chalkboard vinyl, then cut out the silhouette, peel the backing off and stick it on your chosen surface.


I found these crumpled edge metal plates at Urban Barn in the clearance area for about $5/ea. This would work well on a white plate or a frame with a nice fabric or paper under the glass as well.

After I had positioned the portraits, I glued a picture hanger on the back (be careful to centre it to your subject's head) using Goop.


That glue is like magic. I haven't found anything yet that it won't stick together.

Ta-Da!


That was about 10 or 15 minutes, at the most. I think my son's is a bit more successful as more of his features seem to show. I think it is his hair ~ maybe if I would do it again, I would try to be sure that my daughter's had something more distinctive showing, but overall, I think it works!

I had a couple of smaller platters that I had picked up at the same time and I decided to hang them all together.