Pinterest

Follow Me on Pinterest

Tuesday 20 December 2011

An Ikea Makeover

For those who follow me on Facebook, you will remember this Ikea table that I started a few weeks ago:


It was a pretty big project for me as I have limited space to work and this is a large table with a leaf. It came to me in many pieces and I knew I wouldn't be able to put it back together in my workspace. As it is a big flat expanse, I wanted to be sure that everything would match and look like it belonged together.


Hilary asked for a distressed look, but didn't want it just plain white. We decided to try a rub over the paint to highlight the distressing and add some interest and depth to the flatness of the table. As this has been a family table for many years, I tried to respect the history by distressing the areas that already showed signs of use. The dents and marks add so much character to what could otherwise be a plain piece of furniture.


As I couldn't take a picture of the finished product, Hilary was kind enough to send me some of the table back in her lovely home.


I love the fireplace in background!


The resolution is not great, but you can see how the look and feel of the table has changed. 


Thank you Hilary for sharing your pictures!


There are so many ways to refresh these old relics and give them a new life in your home.  


Only 5 more sleeps!

Saturday 17 December 2011

Mad Rush

We are in the homestretch to the big day! I think I am finished my shopping, other than those last few stocking stuffer types of things... I have been trying to pace myself ~ working in the morning and hitting the shops for an hour or two in the afternoon. So far I haven't killed anyone so I consider this a successful method...


I am madly finishing a few projects for some customers before my kids are finished with school next week. We have had a crazy fall and I want to be able to dedicate some time to being a family while they are off school. My husband has also booked some time off after Christmas which is a first for us so I want to be sure to enjoy it. The last month has been cray-zee.


This beautiful cabinet went home with Raelynn this afternoon.


This was inherited from her Grandmother so it had a lot of sentimental value. It also had a distinctive 70s flavour that did not go with Raelynn's beautiful home. 


She wanted to incorporate it into her decor. It was in terrific shape, but obviously dated. I gave it a good sanding and priming and painted it Graystone from Benjamin Moore. I just love this grey as it is a true grey and doesn't end up looking green or blue. The louvers in the doors are sooooo charming ~ I wanted to be sure to highlight them with some extra distressing.


Instead of replacing the hardware, I sprayed it with Krylon's flat black and I love the way they turned out. They are so pretty this way. I also lined the drawer and back of the cabinet with the last of my black and white wallpaper.


This is such a nice and pretty surprise and really finishes this piece off so nicely. 


I love to be able to re-invigorate these old classics. When they come from someone who is loved and cherished, it is so nice to be able to incorporate them back into a family home while adding some contemporary flair. 


The countdown is ON.

Thursday 8 December 2011

All the Extra Stuff

I have been getting my house decked out for Christmas and getting a few projects finished up for the season.


I love seeing the house all cozy and Christmasy, but it can be a lot of work! My kids love to help, which seems nice, but lets face it, it can easier to just do it yourself!


Remember these old stumps?


They have finally dried out and I have done something with one....


I was inspired last year by this post from Karen at The Art of Doing Stuff. I roughly followed her guidelines and now I have my very own tree stump in the house. In this part of Alberta, tree stumps of this size are not easy to come by! I had to source mine from north of Edmonton...


It is peeled and sanded and has several coats of poly on it too. I am thinking about adding some legs ~ a friend suggested some castors and I think I like that idea even better! In the meantime....


My standard puppy picture! Isn't she cute!


I wish I could remember where I saw the idea for my next home project... I read a version of it somewhere! 


As I often visit thrift stores, old wood bowls and candle holders and things like that are a fairly common find. How to repurpose them?


I used GOOP and glued the candle holders to the bowls.


After letting it set and dry, I spray primed the whole unit. I then sprayed each piece with a glossy grey that I had on hand and *voila*, a pedestal bowl!


I don't think this is food safe, but it so nice for adding height and interest to a mantle or table.


Each little pedestal was only a few dollars and looks unique.


I found a sofa table a few weeks ago on kijiji and I could not pass it up.


Typically honey coloured and dated, but so solid and with lovely lines. I brought it home and it fit so perfectly against a wall by my couch that I decided to keep it for now. I painted it a dark taupey grey and fell even more in love with it. I had visions of doing a beautiful seasonal display on it... This vision was dashed by the arrival of not one, but TWO Lego advent calendar for my kids. My husband thoughtfully bought them each one (Star Wars and City ~ complete with poor Yoda in a Santa suit no less). These suckers take up a LOT of room, so now we have a lovely spot to very prominently display them.


Sigh. 


I will try again at Easter.


In other news, I am very excited about the arrival of my stamp with my new logo on it. I have been stamping everything in sight!


I have a few commissioned pieces to finish up before Christmas. I have promised my family to take some time "off" with them so I will be back to more regular posts and sale items in January.

Sunday 4 December 2011

School Days

I just realized that it has been a very long time since my last post! I haven't listed any new items for several weeks either as I have been so busy with doing some custom pieces and managing our new little addition Lucy. She is a 6lb, 3 month old cairn terrier/westie cross. She is a lot of fun, but a bit of work...


I think I have a schedule worked out at last. She is good company and I am totally in love with her!


The most recent piece that I am featuring here is an old oak teacher desk and chair. It had that old-timey institutional feel to it. You could almost smell the chalk dust....


My good friend Brenda had this in her basement and was going to get rid of it. I was more than happy to take it off her hands, but a few weeks later, she decided that she would like it made-over for her toddler son for his room. It is the perfect size for a transition piece from baby to little boy. She had already picked out his new bedding and had a colour scheme in mind so I used that as my inspiration on the chair.


I spray painted the metal frame with Krylon's green ivy and painted the stripes on the back and seat with paint that coordinated with the new linens. I lightly distressed the striped and sprayed the newly painted wood with a poly for extra durability. I love the way it turned out ~ it looks fun and fresh! Perfect for a little boy!


Brenda wanted the desk to be red. Painting with red always requires a little extra patience and work as to get good coverage means at least 3 or 4 coats. I think the results are worth the effort...


I added a few little stamps to the drawer pulls for fun.


The pull out writing board needed an upgrade for the 2 year old as well and a few coats of chalkboard paint did the trick.


I distressed the edges a little bit and rubbed a layer of wax over the surface. 


I have had this finished in my basement for a little while, but as Brenda lives several hours away, we have not been able to coordinate a time to get it back to her house. My father in law is coming for a visit today and has graciously offered to be my delivery guy. I am excited to see it installed in its new home!


Posts will be a little slower as we get closer to Christmas. I have a few smaller pieces that I hope to list, but I have committed to several custom orders as well. This time of year time gets to be crunched in a big way but I have so many ideas for January! Stay with me ~ I am so touched by the emails and encouragement...

Thursday 17 November 2011

Refilling!

I made a quick run out to Rosebud this morning to fill in a few holes from some pieces that have sold. It was a beautiful drive, although I was VERY pleased that the snow that was forecast for SE Alberta chose to stay away while I was on the road. That wind is very cold and a reminder that true winter is coming...


I have been messing around a little with the Book Page Wreaths. They turned out nicely and seem to be a popular seller.


A Rectangle Shaped Wreath.

Using a Graphic Novel. I think it adds a little interest ~ not for everyone...


I wanted to make a non-traditional Christmas Wreath. I really like the way this turned out.

I should add that no books were really harmed ~ well okay, they were taken apart, but I get all of the them from the withdrawn books at the library. They have all lived good and healthy lives and were deemed too "used" to be on the shelves. As a book lover, I hate to see books destroyed, but it is nice to have them used in a new way if they will be thrown away. By the way, the Christmas Wreath was made using John Steinbeck's East of Eden ~ one of my favourite books. Not really a Christmas type of book, but still....


This is a really large frame that I lined with chicken wire ~ great for displaying photos, artwork Christmas cards or just looking pretty.


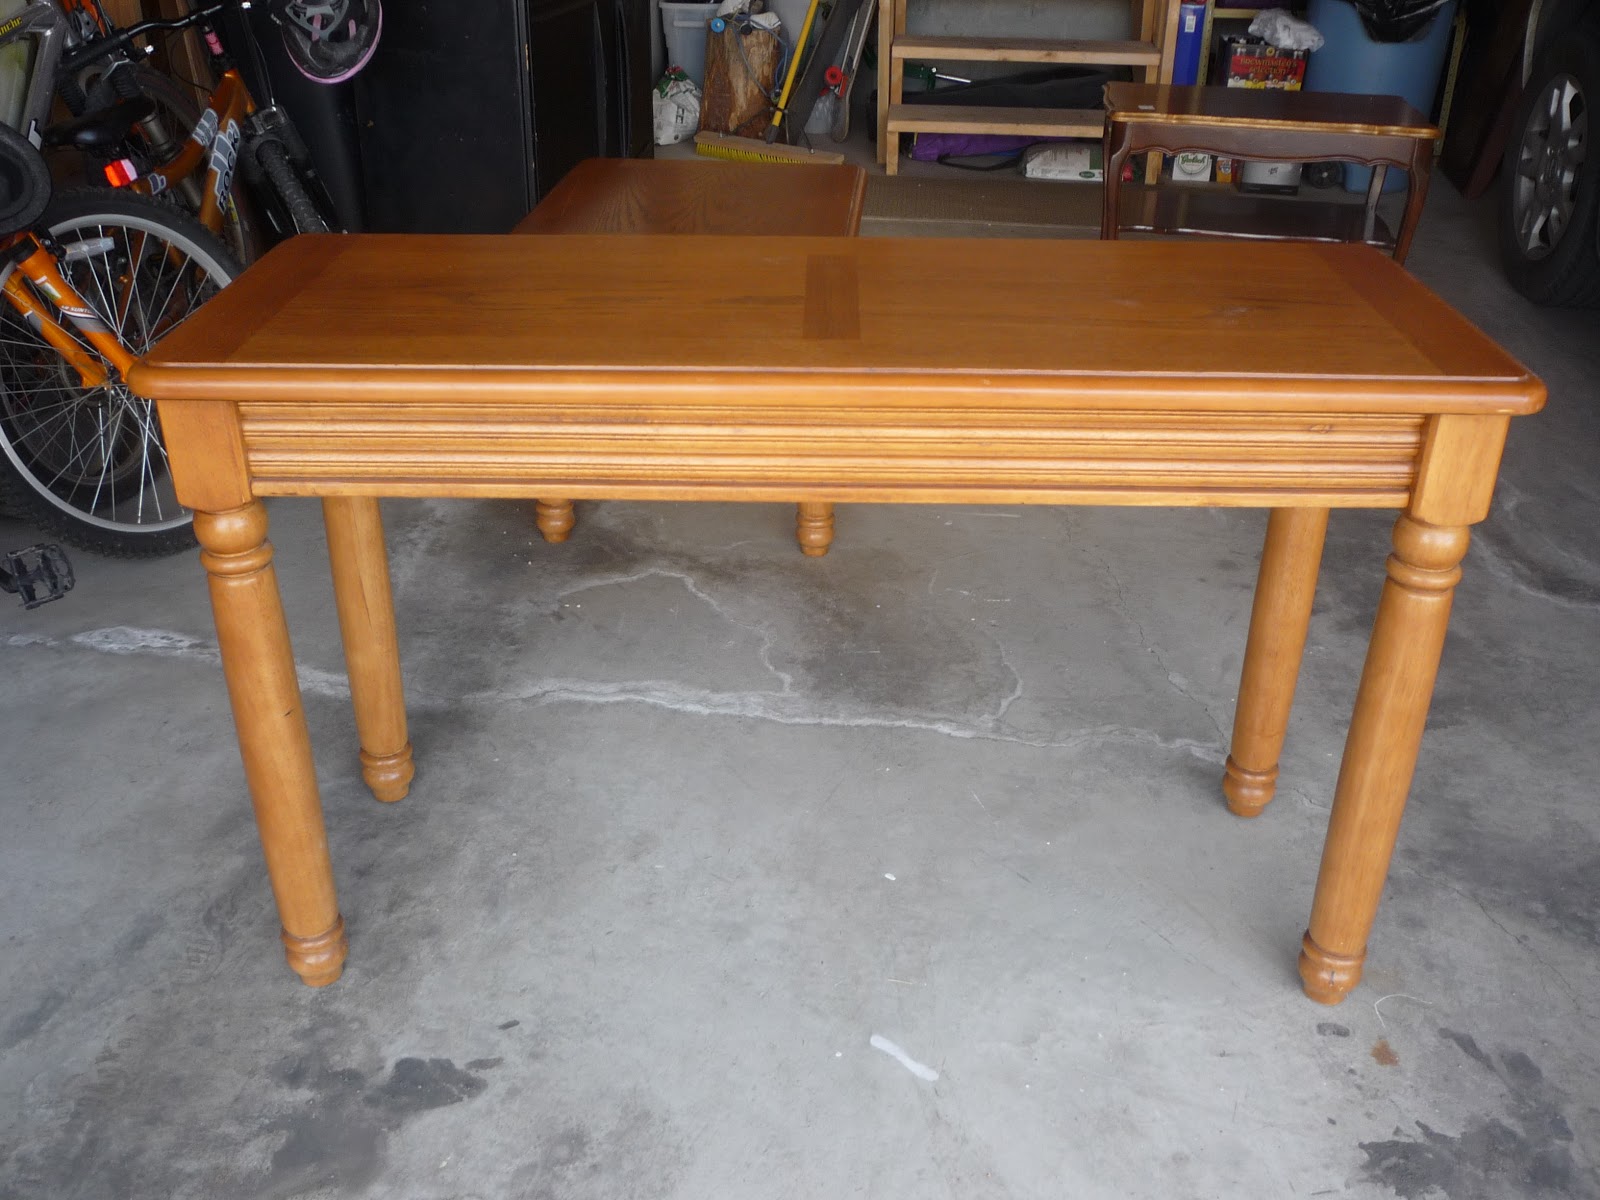
A nice and heavy side table. The light is not great in these pictures as the tour buses were pulling up (you can see the tires) and the passengers were starting to fill up the space so I was in a hurry!


The light is really bad here, but the table is really shabby and distressed. I used old hardware and gave it a new look for the drawer. I also made some more of the pretty framed dry erase memo boards as the others had sold fairly quickly.


A couple of the larger pieces are still available. I am getting to work on a couple of commissioned items this upcoming week that I am excited about! My 11 year old son has had his bedroom torn apart for about a month in anticipation of a makeover. We sold his bed and so the poor guy has been sleeping on his mattress on the floor. I have been so busy that we haven't been able to tackle the rest of the pre-teen overhaul so I need to dedicate some time to him.

For more consistent updates, you can also visit my Facebook Page and even "like" it!

Monday 14 November 2011

Dressed Up

Things have been selling well at the Rosebud Mercantile so I have been working to fill in a few of the empty spots. The nasty GI virus that is afflicting everyone hit my house hard the past 5 days resulting in sick kids and me compulsively cleaning and bleaching whatever I could. I have so far avoided it by some miracle so I hope my momma immunity superpowers continue to stay strong.

In the meantime, I had Erica contact me to do a dresser for her. I had just spotted a beautiful dresser at the local Salvation Army so I grabbed it. It was long and had 9 drawers!

BEFORE


It was in great shape and didn't need many repairs. Erica had requested a beautiful blue from Benjamin Moore called Province Blue. I lightly distressed the edges and replaced the hardware with some vintage pulls I had some access to (I have a great kijiji-ing friend!). I sprayed the hardware a pale grey using Krylon spray paint and primer and lightly distressed these as well.

AFTER


I think it looks so pretty now and the blue colour with the grey hardware is just a little unexpected. After lining the drawers with a pretty paper and finishing the whole piece off with a wax polish, the project was complete! Erica came with her guy tonight and picked it up. It will give her some extra storage and look gorgeous at the same time!


I love that I was able to reuse vintage hardware to help keep the costs down and recycle too!

I have a few challenging pieces ahead of me that I am looking forward to attacking...


Wednesday 9 November 2011

Fully Installed!


Yesterday I drove east for about an hour out to the little town of Rosebud, Alberta. It is a very special place in southern Alberta as it is home to a very popular theatre company and people come from all over the world to attend the dinner theatre and browse the galleries and little shop there. I am beyond thrilled to have the opportunity to put a selection of my pieces in the Mercantile area of the theatre. These will be available for purchase to the public during the Christmas season. I chose to put a few things in that I normally don't sell online as they are small things that I like to try out for my home or as gifts for friends. If you like any of it, let me know and I will do my best to create something similar for you.

Here is a shot of some of the goods as they were installed yesterday. I had a lot of help and support from the incredibly talented Valerie Speer ~ she works in Rosebud and is an amazing artist. Check out her stuff ~ you will love it!


Here are a few individual photos of some of the pieces on display.


Midcentury bookcase

Child's table with chairs and chalkboard

Book Page Wreath

Shabby Architectural Interest Piece

Shabby Ladder

BEFORE

AFTER ~ Distressed Telephone Bench

Old Window Frame with Netting and Knobs
*great for jewelry or photos*

Large Shabby Leaner Mirror

Small Frame with Wire


Distressed groupings of Frames

This has definitely been a new experience for me. I usually do one piece at a time so to see all of it together is very exciting. 

I am working on a few new things this week that I think will be great! I love to hear from readers and friends about what they see that inspires them.... Enjoy your day!